
How to Reheat Pizza: The Ultimate Guide
We all know the joy of ordering too much pizza. Having extra slices waiting in the fridge feels like a gift to your future self. But when the time comes to eat those leftovers, you face a critical choice. How do you bring that cold, stiff slice back to life?

We all know the joy of ordering too much pizza. Having extra slices waiting in the fridge feels like a gift to your future self. But when the time comes to eat those leftovers, you face a critical choice. How do you bring that cold, stiff slice back to life?
Eat it cold, and you miss out on the gooey cheese and fragrant crust. Reheat it poorly, and you end up with a soggy mess or a chewy piece of cardboard. You deserve better.
Reheating pizza is both an art and a science. The goal is simple: melt the cheese, warm the toppings, and restore the crust to its original crispy glory. Whether you want a quick fix or a restaurant-quality revival, we have you covered.
In this guide, you will learn exactly how to reheat pizza using the best tools in your kitchen. We will explore five major methods, share practical insights, and help you avoid the most common mistakes.
The Science of Reheating Pizza
Before diving into the methods, it helps to understand what happens to pizza when it sits in your fridge.
Pizza crust is made of starch and water. When it bakes, the starches swell and trap water, making the crust fluffy inside and crispy outside. As the pizza cools, those starches crystallize. This process pushes the moisture out, which makes the crust tough and chewy. Meanwhile, the moisture from the tomato sauce seeps downward into the dough, creating a soggy bottom.
To reverse this, you need a method that heats the pizza from the bottom up. You must crisp the base while applying gentle, moist heat to the top so the cheese melts without drying out.
Let us look at the absolute best ways to achieve this perfect balance.
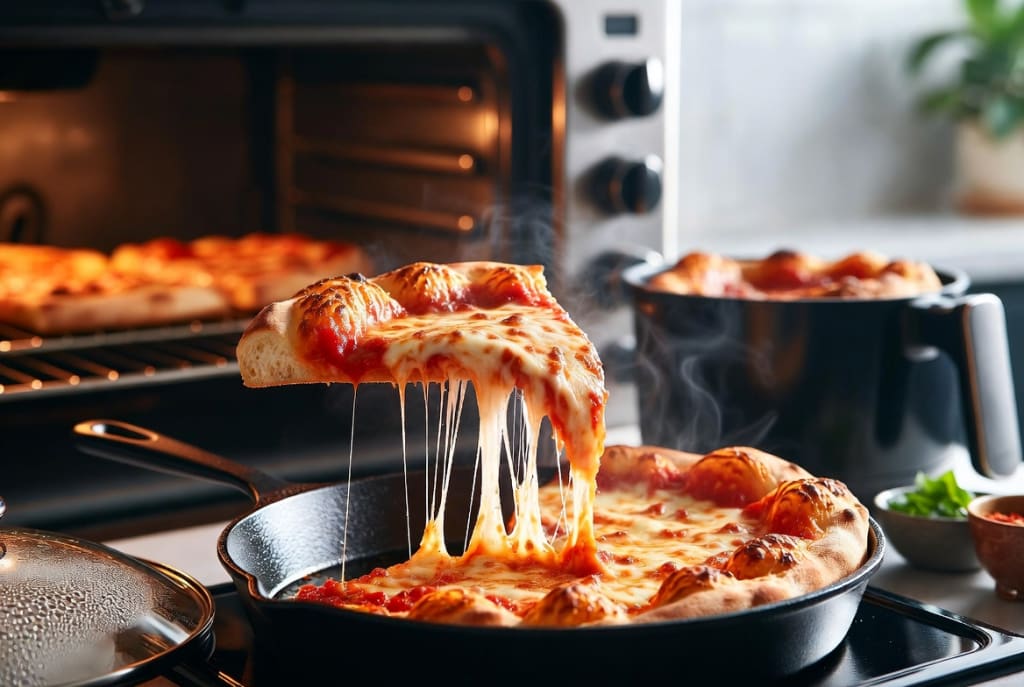
Method 1: The Skillet Method (The Clear Winner)
Ask any pizza enthusiast, and they will tell you the stovetop skillet is the undisputed champion of reheating pizza. It perfectly balances a crispy bottom crust with gooey, melted cheese.
How to do it
1. Grab a skillet: Place a non-stick skillet or a cast-iron pan on your stove. Do not turn the heat on just yet.
2. Place the pizza: Put one or two cold slices directly into the cold pan.
3. Heat it up: Turn the burner to medium-low heat. Let the pizza warm up slowly for about 2 to 3 minutes. This gradual heating crisps the bottom without burning it.
4. Add water: Once the crust feels crisp, add half a teaspoon of water to the pan. Drop the water far away from the pizza slice so the crust stays dry.
5. Cover and steam: Immediately cover the skillet with a tight-fitting lid. The water will turn to steam. Let it sit for 1 to 2 minutes.
6. Serve: Remove the lid. The cheese should be perfectly melted, and the crust will snap when you fold it.
Pros and Cons
• Pros: Unbeatable texture. The crust gets incredibly crispy, and the steam perfectly revives the cheese and toppings.
• Cons: You can only heat one or two slices at a time. It requires your active attention.
Pro Tips
Use a heavy cast-iron pan if you have one. Cast iron retains heat beautifully and provides a superior crunch. If your pizza has a lot of heavy toppings, lower the heat slightly and increase the steaming time to ensure everything warms through.
Method 2: The Oven Method (Best for Multiple Slices)
If you need to feed a family or reheat half a pie, the skillet method takes too long. The oven is your best friend for heating multiple slices at once. It mimics the environment where the pizza was born.
How to do it
1. Preheat the oven: Set your oven to 375°F (190°C). Wait until it is fully heated.
2. Prepare the tray: Line a baking sheet with aluminum foil. For an even crispier crust, place the foil directly on the oven rack and heat it up with the oven.
3. Bake: Place your pizza slices on the hot foil or baking sheet. Leave a little space between each slice so the hot air can circulate.
4. Wait: Bake the slices for 8 to 10 minutes.
5. Check the cheese: The pizza is ready when the cheese bubbles and the crust feels firm to the touch.
Pros and Cons
• Pros: Highly hands-off. You can reheat an entire box of pizza at once. The results are incredibly close to a fresh pie.
• Cons: It takes time. Waiting for the oven to preheat requires patience.
Pro Tips
If you own a pizza stone, use it! Place the stone in the cold oven and let it preheat. Sliding your cold slices onto a blazing-hot pizza stone creates a phenomenal bottom crunch. If your crust starts to look too dark before the cheese melts, loosely tent a piece of aluminum foil over the top of the slices.
Method 3: The Air Fryer Method (Fastest for a Crispy Crust)
Air fryers act like powerful mini-convection ovens. They circulate hot air around the food, making them incredible tools for reviving fried foods and pizza. If you want a fast, super-crispy slice, this is your go-to method.
How to do it
1. Preheat: Set your air fryer to 350°F (175°C). Let it warm up for about 3 minutes.
2. Load the basket: Place one or two slices into the air fryer basket. Do not overlap them. The hot air must touch all sides of the slice.
3. Cook: Heat the pizza for 3 to 4 minutes.
4. Monitor: Check the pizza at the 3-minute mark. Air fryers cook rapidly, and cheese can quickly cross the line from melted to burned.
Pros and Cons
• Pros: Incredibly fast. Yields a loud, satisfying crunch. Does not heat up your entire kitchen like a traditional oven.
• Cons: Space is limited. You cannot fit more than a couple of slices. Lightweight toppings (like spinach or thin pepperoni) might fly around due to the fan.
Pro Tips
If your air fryer tends to blow toppings off your slice, secure them with a toothpick before cooking. You can also lightly mist the top of the pizza with water or cooking spray before placing it in the basket to keep the cheese from drying out.
Method 4: The Grill Method (For a Smoky Crunch)
Do not overlook your backyard grill. It operates at high temperatures just like a commercial pizza oven. This method adds a wonderful smoky flavor and a serious char to your crust.
How to do it
1. Fire it up: Turn your gas grill to medium-high heat, or prepare an even bed of charcoal.
2. Create a buffer: Tear off a piece of heavy-duty aluminum foil.
3. Grill: Place the cold pizza slices on the foil, then set the foil directly on the grill grates.
4. Close the lid: Shut the grill lid to trap the ambient heat. This melts the cheese while the direct heat crisps the bottom.
5. Cook: Let it heat for 4 to 6 minutes. Check frequently to ensure the bottom does not burn.
Pros and Cons
• Pros: Gives the crust a unique, fire-baked flavor. Great for summer months when you do not want to turn on the indoor oven.
• Cons: Weather-dependent. It takes time to preheat an outdoor grill just for leftovers.
Pro Tips
Keep a close eye on the grill. The high heat can turn a perfect crust into black charcoal in less than a minute. If the bottom is getting too dark but the cheese is still cold, move the foil to a cooler zone on the grill and keep the lid closed.
Method 5: The Microwave Method (The Last Resort)
We must address the elephant in the room. Microwaves heat the water molecules inside food. This turns the moisture in the pizza sauce and crust into steam. The result? A rubbery crust and molten, oily cheese. You should avoid the microwave whenever possible. However, if you are stuck in an office breakroom with no other options, you can try this trick.
How to do it
1. Plate the pizza: Place your cold slice on a microwave-safe plate. Put a paper towel under the slice to absorb some of the excess moisture.
2. The water hack: Fill a microwave-safe mug with water. Place the mug next to the plate in the microwave.
3. Heat: Microwave on high for 30 to 45 seconds.
4. Check: If it needs more time, heat in 15-second bursts.
Pros and Cons
• Pros: It is the absolute fastest way to get hot food into your stomach.
• Cons: The crust will never be crispy. It usually becomes tough and chewy as it cools down.
Pro Tips
The mug of water absorbs some of the microwave energy, which prevents the pizza crust from becoming completely rubbery. Eat the microwaved pizza immediately. Once it cools down, it becomes nearly impossible to chew.
Practical Insights: How to Avoid a Soggy Crust
You cannot fix a soggy crust if you store your pizza poorly. Great reheated pizza starts the moment you put the leftovers away.
Never leave pizza in the cardboard box. Cardboard absorbs moisture from the sauce and cheese, leaving the crust stale and dry. Worse, the open air circulates inside the box, accelerating the staling process.
Instead, wrap individual slices tightly in plastic wrap or aluminum foil. You can also stack them in an airtight container, placing a layer of parchment paper between each slice to prevent sticking. Store them in the fridge for up to four days.
The Best Tools to Use
Equipping your kitchen with a few basic tools makes a huge difference:
• Cast-iron skillet: Holds heat beautifully for the stovetop method.
• Pizza stone: Replicates a brick oven environment.
• Parchment paper: Keeps slices separated in the fridge.
• Glass lid: Allows you to watch the cheese melt during the skillet method without letting steam escape.
Time-Saving Hacks
• Skip the preheat: If using the oven method, you can place the pizza on a foil-lined baking sheet and put it in a cold oven. Turn the heat to 375°F (190°C). As the oven warms up, the pizza warms up slowly, which helps draw out moisture and crisp the crust.
• Slice it small: Cut your large slices in half before putting them in the air fryer or skillet. Smaller pieces heat through much faster.
Common Pizza Reheating Mistakes to Avoid
Even with the best methods, things can go wrong. Watch out for these common errors:
• Using high heat: Whether on the stove or the grill, blasting your pizza with high heat will burn the bottom to a crisp while leaving the cheese ice-cold. Always opt for medium or medium-low heat.
• Overcrowding the pan: If you cram too many slices into a skillet or air fryer, the air cannot circulate. The slices will steam instead of crisping.
• Microwaving without a paper towel: If you must use a microwave, a paper towel underneath the slice is non-negotiable. It catches the steam and grease that cause the dreaded soggy bottom.
• Ignoring the crust type: A thick deep-dish slice requires lower heat and more time than a thin New York-style slice. Adjust your timing based on the thickness of the dough.
Creative Ways to Reuse Leftover Pizza
Sometimes, reheating a slice is not enough. You can transform your leftover pizza into entirely new meals.
• Pizza Croutons: Stack two cold slices with the cheese sides facing each other. Cut them into small squares. Fry the squares in a pan with a little olive oil until crispy. Toss them over a fresh Caesar salad.
• Pizza Eggs: Chop a cold slice into bite-sized pieces. Toss them into a hot skillet with butter. Pour beaten eggs over the top and scramble everything together for a savory breakfast.
• Pizza Panini: Fold a large slice in half (cheese inside) and place it in a waffle iron or panini press. Press down until the outside is golden brown and the inside is molten.
Frequently Asked Questions (FAQ)
What is the best way to reheat pizza?
The skillet method is widely considered the best way to reheat pizza. Heating the slice in a pan crisps the bottom, while adding a few drops of water and covering the pan creates steam to perfectly melt the cheese without drying it out.
Can you reheat pizza in the cardboard box?
No. You should never reheat pizza in the cardboard box. Placing the box in the oven is a serious fire hazard. Microwaving the box can release harmful chemicals into your food, and the cardboard traps steam, which guarantees a soggy slice. Always transfer your pizza to a plate, pan, or baking sheet.
How long do you reheat pizza in the oven at 350°F?
If your oven is preheated to 350°F (175°C), it generally takes about 10 to 12 minutes to reheat a standard slice of pizza. You will know it is done when the crust feels firm and the cheese begins to bubble.
Is it better to reheat pizza in the oven or microwave?
The oven is significantly better than the microwave. The oven uses dry heat to re-crisp the crust and gently warm the toppings. The microwave heats the water molecules inside the dough, which turns the crust rubbery and tough.
How do you heat up pizza so it stays crispy?
To keep pizza crispy, you must apply direct heat to the bottom of the crust. Use a hot skillet on the stove, an air fryer, or place the slice directly on a hot pizza stone in the oven. Avoid the microwave entirely.
How long is leftover pizza good for?
When stored properly in an airtight container or wrapped tightly in foil, leftover pizza is safe to eat for 3 to 4 days in the refrigerator. If you freeze it, it can last for up to two months.
Conclusion
Leftover pizza is too good to waste on a soggy microwave experience. By treating your leftovers with a little respect, you can recreate that fresh-from-the-pizzeria magic right in your own kitchen.
If you want the absolute best texture, grab a skillet and use the water-steam trick. If you need to feed a crowd, turn on the oven. And if you are in a rush, let the air fryer work its crunchy magic.
Next time you order pizza, do not fear over-ordering. Knowing exactly how to reheat pizza means you can enjoy perfect, crispy, cheesy slices for days to come. Go ahead and rescue that slice from your fridge—your taste buds will thank you.
About the Creator
Cristina Baker
I’m Cristina Baker, a business and market expert with 8+ years of experience helping brands and entrepreneurs grow. I share insights, strategies, and ideas that inspire growth, spark curiosity, and turn challenges into actionable results.
Keep reading
More stories from Cristina Baker and writers in Education and other communities.
How to Increase Your Revenue by Optimizing Website Performance
Introduction In today's fast-paced digital world, slow website performance is no longer just an inconvenience—it's a major barrier to business success. Whether you're running an e-commerce store, a corporate website, or a personal blog, website speed plays a critical role in user retention, conversion rates, and overall business efficiency. A slow-loading website causes frustration among users, leading to high bounce rates and lost revenue. In fact, research has shown that even a 1-second delay in load time can reduce conversions by up to 7%, ultimately affecting your bottom line.
By Cristina Baker29 days ago in 01
Naushad Parpia On Why Constraints Drive Business Strategy
Business strategy often focuses on growth, expansion, and market opportunities first. However, every business operates within limits that shape decisions and outcomes. Constraints include resources, time, talent, capital, and operational capabilities available. Ignoring these limits creates unrealistic strategies that fail during execution stages. Successful founders identify constraints early and build strategies around them carefully. Entrepreneur Disciplined planning becomes critical before scaling any business, says Naushad Parpia. Constraint awareness improves clarity, focus, and responsible decision-making across teams. This article explains why strategy must begin with understanding business limitations.
By Naushad Parpiaabout 11 hours ago in Education
The Hidden Natural Skincare Secret for Clear, Glowing Skin
Skincare often feels overwhelming with so many products and conflicting advice. People search for quick fixes, hoping for instant transformation. However, the most effective approach is often the simplest one. The true secret to better skin lies in restoring balance and letting your skin function as it was designed to.
By Kelln Smalla day ago in Education


Comments
There are no comments for this story
Be the first to respond and start the conversation.